You are sitting at your screen, smiling. Your new React app runs perfectly, every component in place, the logic humming along… on your computer. And then the question appears: „What now?”. How do you show it to the world simply and – most importantly – for free?
Early on, the deployment process sounds like black magic: complex server configuration, terminal commands, stress. It is a myth. Let me show you a method I use regularly for smaller projects – it turns fear into satisfaction in under fifteen minutes. We will deploy a React app (built with Vite) on Netlify, which does all the heavy lifting for us.
The philosophy: why are Netlify + GitHub a perfect pair?
Before we start clicking, it helps to understand the magic behind it. Netlify connected to a GitHub account creates what is called Continuous Deployment.
Imagine a robot assistant. The only job is to write code and save it on GitHub. Every time that happens, the robot automatically pulls the code, builds a ready app from it and publishes it online – with no one’s involvement. Sounds good? That is exactly what we will do.
Workshop: your app online in 5 steps
All you need is a GitHub repository. Let’s begin!
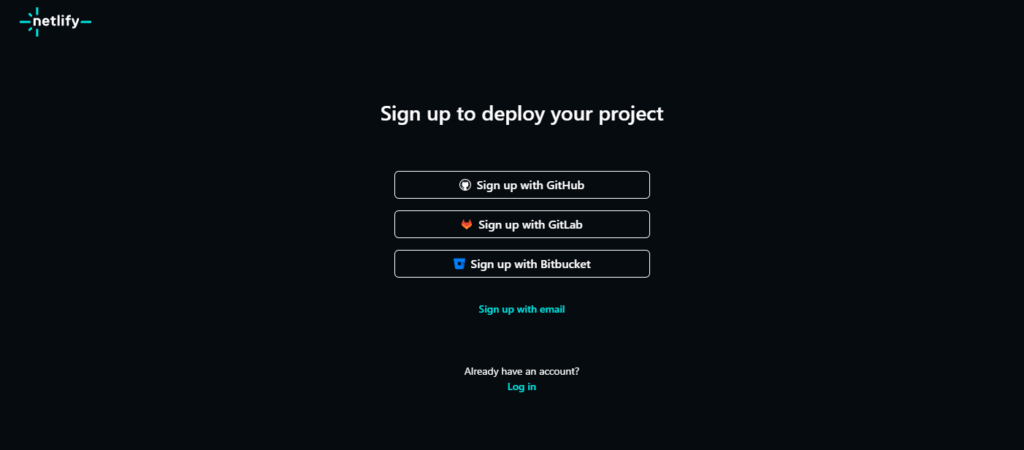
Step 1: log in to Netlify via GitHub. Go to Netlify and choose sign up / log in via GitHub. It is the simplest route – it instantly authorises access to your projects.
Step 2: create a „place” for your site. In the Netlify panel find the big „Add new project” button. This is where the adventure begins.
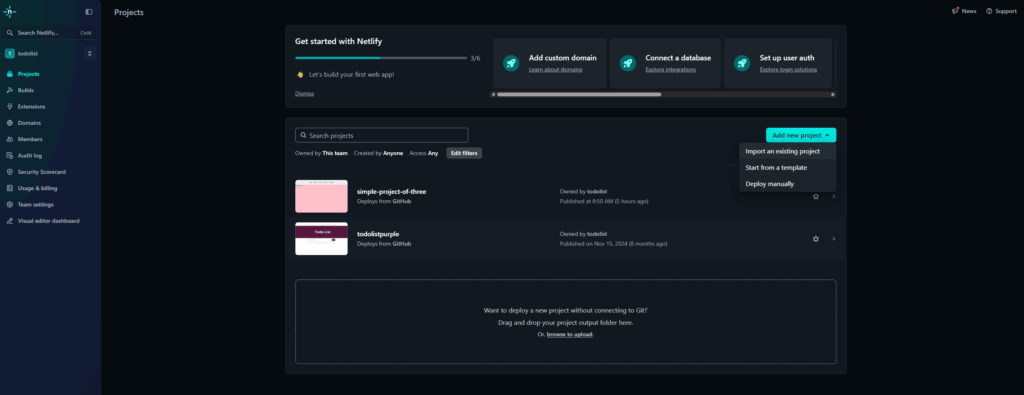
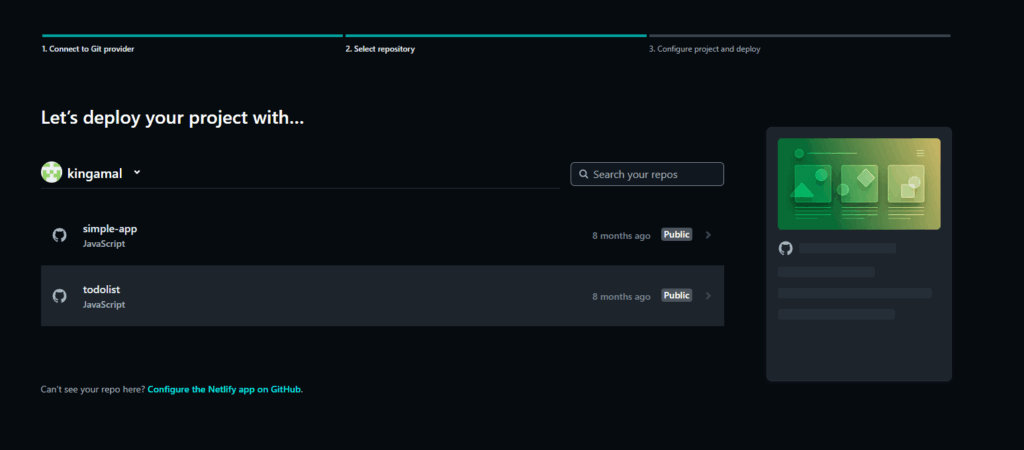
Step 3: point to the repository with your code. Netlify asks you to pick a Git provider – we click GitHub. A list of your repositories appears; choose the one with your React app.
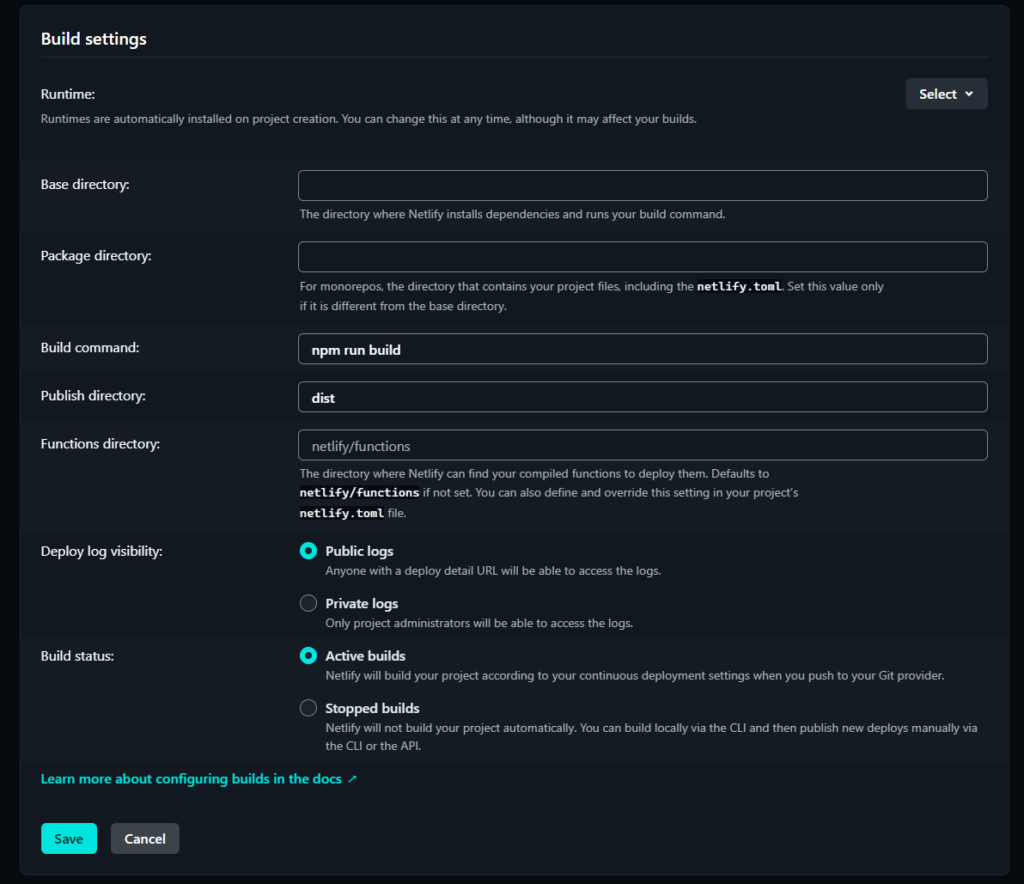
Step 4: how to build the app. A key but simple step – Netlify needs to know which commands to use. For a standard Vite app:
- Build command:
npm run build(oryarn build) - Publish directory:
dist
That is it – you just tell it how to build the project and where the ready version is.
Step 5: „Deploy” and the magic happens! After setting the commands you click „Deploy site”. Netlify pulls the code, runs the build, and within a minute or two your site is online at a generated address. Done – the project is live!
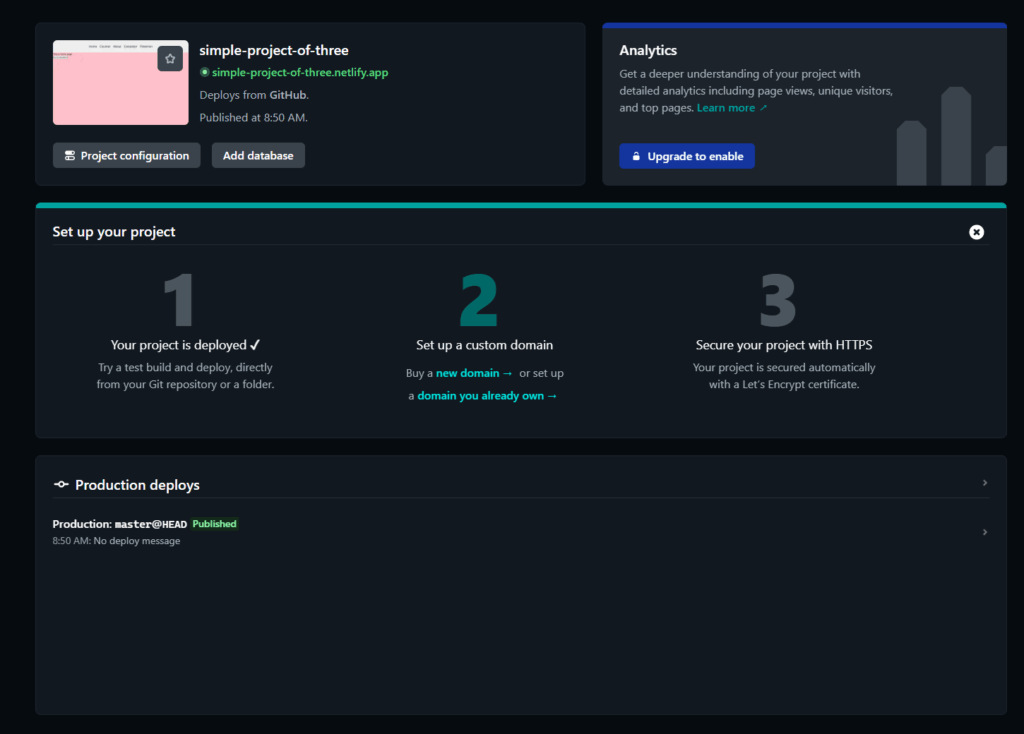
The result: more than a site online
The biggest benefit is not publishing the site itself, but setting up an automatic process. From now on, no more manually uploading files to a server – you just write code and push it to GitHub (git push). The rest is handled by your free assistant, Netlify: every change automatically appears in the published version.
The tools we use should make our work simpler. Deployment does not have to be a barrier – it can be a satisfying finishing touch to all your effort.